| This page is in the process of a rewrite! This page is in the process of being rewriten. Some information on this page may differ from how it actually works on Delta-V. A lot of information will be incomplete or may contain placeholders. You can help Delta-V by expanding it To-Do: Big rewrite needed - Please move information about the TEG, trit production, and frezon productions to their own separate pages |
Atmospherics (Departmental layout)
Atmospherics (commonly referred to as "atmos" or "atmosia") is a subset of the engineering department that is responsible for providing breathable area to all of the station and getting rid of toxins from the area. There are many areas of atmos that have specific names and serve a specific purpose.
The Distribution System
The Distribution System (usually shortened to "distro") is a part of atmos that is responsible for distributing breathable area around the station and getting rid of toxic gases from the environment. The Distribution System is split up into two part, "distro" and "waste." Distro is what fills the station with breathable area via vents. This network of pipes is usually blue. Waste is what toxic gases are siphoned into via scrubbers. This network of pipes is usually red. Usually, a station can go about 40 minutes to an hour without any of this being turned on, but that's only if there isn't anything horrible that goes wrong like a gas leak or an area getting spaced. So it should still be one of your topped priorities to get it on and working.
Gas Chamber
Note: Replace image to show the unique DeltaV gas textures
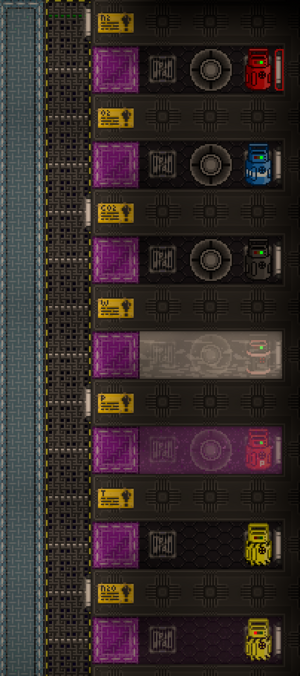
Every distro setup will have gas chambers for gases that you can mine and collect during the shift. At the least, there will be 2 chambers, one for oxygen and one for nitrogen. These two chambers will always have gas miners (with the Exception of Shoko, which has no oxygen miner) that give you infinite oxygen and infinite nitrogen. Most stations will have another chamber that is filled with plasma that doesn't have a miner and a few more extra chambers to collect other gases that might show up during the shift from gas leaks or dead bodies.
Distro Loop
Each distro system may vary from station to station on how complete they will be. Some will be very simple and easy to understand. Some will be overly complicated and be very confusing to look at. Some will be completely empty and the mappers have left you 3 stacks of steel to build it all from scratch.
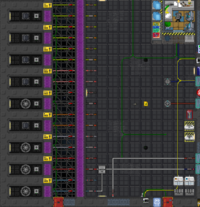
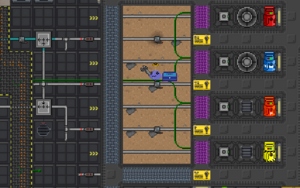
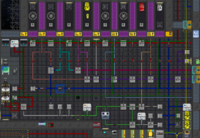
Whatever the situation is, take your time to make sure you're setting it up correctly. All distro set ups should have a gas mixer that is 22%-25% oxygen and 78%-75% nitrogen. This is different from upstream because of Harpies, who need oxygen to be at least 22% so they don't suffocate. It varies depending on what you prefer your setup to be. the percentage of oxygen should not go above 30%, as that makes air alarms start to go off.
Distro should also be about 20C (293.15K) as this is a safe temperature for all species. There will usually be a heater and freezer connected to distro and set to 293.15K to achieve this temperature, but this isn't always needed.
To optimize distro, you should set the distro pump to 200 kPa. This allows more gas to fill the pipe network across the station and allow it to fix any spacing that happens. it is ill-advised to set the pump any higher than 200 as someone could easily sabotage distro by placing an air injector in a closed room or a passive vent into space, emptying the entire distro network and not allowing it to refill any space rooms.
Waste Loop
The waste line is something that you usually have to build yourself. This can be achieved by placing gas filters in front of every gas chamber and setting each gas filter to filter out a specific gas. There should be pipes under the walls to gas chambers that will automatically connect to the gas filters you place. Use a t-ray scanner to see the pipes. It is ill-advised to filter oxygen or nitrogen into their respective gas chambers unless you have a heater and freezer on your distro/waste line. Fires happen around the station. When fires/frezon leaks happen, the superheated/supercooled gas gets siphoned into waste. If there's nothing to regulate the temperature of these gases, superheated/supercooled gas will then be sent into the distro network, burning/freezing the entire station.
Gas Recycler
A handful of stations may come with a gas recycler, if they do not then you can make one when Epistemics researches it. One particular station, called Shoko Station, *relies* on a recycler, as it has no oxygen gas miner. A gas recycler can turn carbon dioxide and nitrous oxide into oxygen and nitrogen, respectively. It requires 3000 kPa and the gas flow inside of it to be 300C to function. Pressure can be caused by other gases being added to the recycler loop. The gases that leave the recycler will still be heated, so it's important to cool them in some way. Either through the use of freezers or cooling via space.
Mix Chamber

The mix chamber is an empty holding area with its own separate loop of pipes and pumps in atmospherics. The mix loop is generally marked with brown pipes and the holding chamber can usually be found close to the external hull, separated from the station by reinforced walls and windows. There will be an emergency button nearby to vent the chamber to space if you need to dump your mix in case an accident arises, or you just wish to reset the chamber for a new mix. The mix chamber is here for you to experiment with different mixes, ratios, temperatures, and pressures while combining gases.
On most stations the Mix chamber will loop around to either to the distro loop, or back to the waste loop. It is generally a good practice to have your mix loop flow back into the waste loop to recycle any unspent gases. You should NEVER have the mix loop flow into distro unless you have a very good reason. Most savvy Atmospherics Technicians physically disconnect the mix loop from distro at round start to prevent an easy sabotage target or accident from occurring later in the round.
See the guide to Gases if you are interested to learn how different gases interact with each other at different temperatures and pressures.
See the guide to Setting up the mix chamber if you want to learn how to properly and safely use the mix chamber.
Setting up and understanding the Thermoelectric Generator (TEG)
| This page is a stub! This page is a stub, meaning it is considered too short, incomplete and/or lacking information about the page's subject. You can help Delta-V by expanding it. |
This section is currently an incomplete placeholder guide. I do not know this stuff sufficiently to write the guide. For better info, check #atmos thread on Discord.
Note: Please make a separate page for the TEG
The TEG has two pipe inputs for gasses - an input for a hot gas, and an input for a cold gas.
The TEG works by transferring heat energy from the hot input gas to the cold input gas, generating power as part of the transfer. Currently (June 2025) the amount of heat transfered from a gas when it passes through the TEG is 10% - meaning 90% of heat energy in the gas remains. How much heat energy a gas can "contain" is determined by its specific heat capacity.
Furthermore the efficiency of the TEG scales with the difference in temperature between the hot gas and the cold gas.
Thus, ultimately for the TEG to work we need:
- A cold gas - the "cold loop"
- A hot gas - the "hot loop"
- Continious flow of both gasses.
The cold loop - space radiators and cooling the TEG
To maintain the TEG's output, the cold loop will need some way to stay cold. Space is cold... sort of. There isn't really anything to give the heat to. Instead, radiators placed outside in space have to release the heat as infrared radiation, which is significantly less effective than exchanging heat with an atmosphere. You will need more radiators.
The best way to use radiators for the cold loop is in parallel, with each radiator having a volume pump going into it and a gas pump going out. These pumps will split up the incoming gas equally and force circulation through the radiator. The speed for the input pumps should each be set as a fraction of the 200L/s maximum speed of the volume pump, divided by the amount of radiators, for example if you had 4 radiators in parallel, the input pumps would need to be set to 50L/s each.
Placing the same radiators in series will mean the output is technically colder, but the heat loss diminishes as the gas cools and passes through more radiators, resulting in a reduction of flow from the smaller pressure difference between the sides of each successive radiator. Flow is just as important as temperature for the cold loop.
Also, radiators in space work better on lattice, as more of the radiator is exposed. Remember that underfloor tiles can be removed using a fireaxe or RCD.
When filling the cold loop, you will want a gas with high heat capacity, such as plasma or possibly frezon, to maximise the amount of energy that can transfer between the loops. The lower temperatures mean your usual cold loop can easily take an entire canister of plasma without causing issues.
The hot loop - setting up and using the burn chamber
There are two ways to get a hot gas for our TEG - we can either heat it up by exposing it to a very hot area (the burn chamber), or by pumping in the hot gasses from a fire. However, because usual fire product gasses (carbon dioxide and water vapor) usually have very poor specific heat capacity, and can be difficult to supply consistantly, almost always the former set up is used. Furthermore, discarding the gas after using it to power the TEG is very very wasteful - recall that only 10% of the gas' heat is used every time a gas passes the TEG!
Therefore instead we set up a system, where a gas is passed through a very hot room through radiators, taking up heat from it, passes through the TEG, and then is pumped back around to be heated up again. This is known as the "hot loop". And the aformentioned hot chamber can be made by, well, starting a fire in it - this is called "the burn chamber".
The Burn Chamber
The burn mix, as it is known, can be made either by mixing gasses from two canisters, or by mixing gas from a plasma can and gas from the oxygen miner. At round start, most TEG loops are unfortunately set up with the far more annoying former.
Usually a mix of 3% plasma and 97% oxygen is used. Plasma and oxygen burn at a ratio of roughly 1:1.4, but the high amount of oxygen meets the 'supersaturation' condition to make tritium, which reacts with oxygen again and is the source of majority of the energy in a burn.
Keep in mind that the pressure will rise with temperature, and depending on how much fuel was added initially, you may find the pressure to be above the 9MPa maximum limit for air injectors, even once the gas has cooled below what is useful for the TEG. Therefore, if you want to add more fuel, the pressure will have to be lowered. The simplest way to do this is using the venting blast doors found on every TEG burn chamber. Alternatively you could build scrubbers or pumps to remove the gas which will reduce the heat lost to space.
Igniting the burn chamber can be done in several ways. Ideally you use an igniter, placed in the burn chamber and linked to a button. However, not all TEG burn chambers come with one, and furthermore the igniter is actually a pretty poor ignition tool.
The Hot Loop
The second, crucial part of our set up is the hot gas we will pump through the TEG. This can be in a way understood as a way to transfer heat from out burn chamber to the TEG. Thus, similarly to the cold gas, you want to use a gas with high heat capacity. Practically this usually also means plasma.
We want our hot loop gas to become as hot as possible. This is for a couple reasons, mentioned before - only 10% of a gas' heat is used each time it passes through, and the output of the TEG scales based on the temperature difference between the cold loop and the hot loop.
In a typical hot loop set up there will be 3 critical pumps and 1 critical valve.
- The burn chamber input pump.
- The burn chamber output/TEG input.
- The TEG output.
- The pressure release valve.
Recall, that it is vital there is a continuous flow of gas through the TEG. If the flow stops, the TEG immediately ceases producing power.
You may recall a crucial formula from Atmospheric Science: pV = nRT. Practically this means the hotter the same volume of gas becomes, the higher its pressure. Because all pumps (including volumetric ones!) have pressure limits, at which they will stop pumping, this means should your pressure get too high, your TEG will "stall".
The pressure release valve is your "emergency button" to reduce pressure should a stall occur. However it is better to avoid a stall in the first place.
A few things can help you in achieving that:
- Use as little gas as possible for your hot loop
- Use volumetric pumps as they have a higher pressure limit. Keep in mind that mixers act as pressure pumps, while filters act as volumetric pumps!
* Other (add here)
A simple step-by-step guide to set up and maintain a station's TEG
Ok that's a lot of text right? A lot to take in? Yeah. So here is a simple step-by-step to practically set up your TEG at round start, so the station has power.
The Mix Chamber
About this guide
So you are ready to graduate from Station Engineer to Atmospherics Technician and are looking for something a little more in-depth than laying down wires and clicking on boxes to set up the AME? Well look no further, after reading this you will be smarter than those dummies next door and have the skills to show for it!
This guide is designed to walk you through, step by step, in creating your first burn mix using the mix chamber. After completion you should have a better understanding on how the mix chamber functions. If everything is done right you will make your engineer coworkers jealous and will be one step closer to mastering atmospherics! If things go wrong, angry crewmembers will be yelling death threats and the admins will very interested in you! Just remember to always learn from any mistakes and understand where and why something went horribly wrong!
Make sure you have a basic understanding on how atmospherics works.
First things first
So you just started your shift as an Atmospherics Technician on space station 14 and want to use the mix chamber. The very first things you should do is grab your equipment. Make sure you have either your firesuit and helmet or atmospheric hard suit and internals available to provide you some protection in case of an accident. Next, be sure to grab your handy dandy gas analyzer to be able to see what's going on inside those pipes. Lastly and arguably the most important thing you should do at round start is to consult with your fellow atmospheric technicians and Chief Engineer. Declare your intention to use the mix chamber and make sure everyone is on the same page. The last thing you want to have happen is your coworker unwittingly dumping your burn mix into the room by un-wrenching a pipe or finding out that they accidently pumped your burning hot plasma mix into distro.
Locating the mix chamber
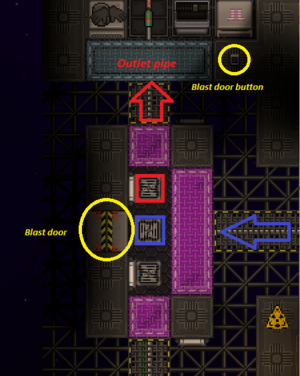
Look around atmosia and locate the gas mixers by the different gas holding tanks. Follow the gas mixers outlet pipes until they all combine and terminate into a pump or manual valve that leads out of the station's hull. Look through the window and observe if the pumps lead into a nearby empty chamber containing both inlet and outlet passive vents and a blast door. If you found this, congratulations! you have located your mix chamber!
Some stations, usually the small ones, are not equipped with a mix chamber. If the pipes lead to a vent in open space and you do not see a nearby empty chamber then there is mostly likely no mix chamber on this station. Feel free to contact the head of your department and Centcom to complain about station budget cuts!
Setting up the pipes
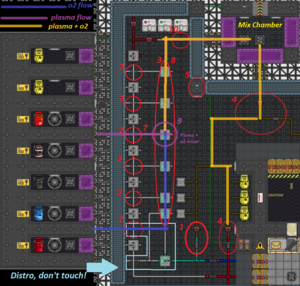
Every station has a different layout so it is a good practice to always refamiliarize yourself at round start with the mix chamber and the mix loop. After you located the mix chamber follow the pipes that flow into and out of it and get comfortable with where they lead. A general mix loop will take gas from the holding tanks, through gas mixers and into the mix chamber. From there they will exit the chamber and loop into an area where you can connect ports and canisters to extract your gas. Some layouts do not have a canister loop and you might have to create your own if needed. Finally the mix loop will connect into waste where the unused gas will be returned to the gas holding chambers to be recycled and reused at a later time. Once you are 100% sure where the mix loop is you are ready to add gas to the chamber.
- Triple check that the pipes leading out of the mix chamber do not flow into distro. if they do, either physically disconnect them or manually toggle off the pumps.
- Toggle off all the gas pumps, except oxygen and nitrogen, leading out of the gas holding chambers.
- toggle off all the gas mixers with the exception the oxygen and nitrogen mixers used for distro.
- Toggle off all the pumps leading out of the mix chamber up to the waste loop.
- Toggle closed the mix chamber blast doors using the button.
- Use your gas analyzer on the pipes leading into and out of the mix loop and check to see that there is no gas in the pipes. If there is, locate where the gas is coming from and toggle that pump closed. Drain the mix loop by locating the mix to waste pump at the end of the mix loop and toggle it open until the gas is gone. Repeat until all gas is gone.
- Locate the pumps leading out of the oxygen and plasma holding chambers and set them to max pressure.
- Locate where the oxygen flows into the next gas mixer down the line and max the pressure. Be sure to configure the input ratios depending on what side of the mixer the oxygen is flowing into. Do not touch the gas mixers used with oxygen and nitrogen in the distro loop.
- Work your way down the gas mixer line maxing the pressure and configuring the input ratios until you reach the mixer for the plasma holding tank. Set the input for oxygen to be at 66% and the input for plasma to be 33% and set the pressure to be around 100-200kPa.
- Continue down the line up to the chamber opening up and maxing the pressure of all pumps until you see gas flow into the mix chamber.
If everything is done correctly you should see plasma gas in the mix tank. The exact composition of the gas inside should be 66% oxygen and 33% plasma. If you see this then congratulations! you have created your very own burn mix!
(note that you may need to adjust the output pressure of the oxygen and plasma mixer. Too much pressure will clog up the mix chamber and waste pipes with water vapor waste gas as the plasma burns. Too little of a pressure and the plasma fire will burn itself out. Experiment with different pressures to find one you like!)
If you don't see any gas inside the mix chamber chances are that you forgot to toggle open a pump or max the pressure. double check that the blast doors are closed and that all the outlet pumps on the mix chamber are toggled off. Follow the mix loop back from the mix chamber and use your gas analyzer on each pipe segment until you find where the pressure is at. double check that the right pumps are open and that the pressure is maxed. If there is still no gas flowing double check the mixers and check to see the correct inlet ports are set to the right percentage on the mixer interface. If there still isn't gas in the chamber and you double checked every pipe pump and valve then check that there is gas in the holding tanks. Some stations do not have a plasma miner or there might be a breach venting all your gas into space.
Igniting the burn mix
So, your mix chamber is full of sparkling plasma and oxygen, what's next? Firstly, understand that plasma will ignite at higher temperatures. A plasma fire requires both a steady flow of oxygen and plasma to remain ablaze and will create waste gas in the process. There are many ways to ignite your burn mix but the most common and safest way is to wrench a heater on one of the burn mix outlet pipes. A quicker, dumber, more flashier way is to chuck a lit welder or fire source into the chamber before pressurizing it.
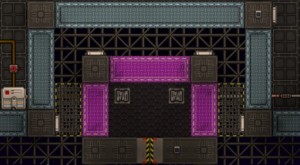
Lets go with the heater method. Simply find a heater nearby in atmospherics or steal one from your silly engineer coworkers. Alternatively you can craft one using a machine frame and some components. Once you have acquired your heater, drag that bad boy over to the mix chamber's outlet pipe. Make sure the location you have chosen has pressurized gas from the chamber, use your gas analyzer to check! You may need to add or remove some pipes and a pump to get a suitable location. Once you have the right location, use your wrench to secure it to the pipe. Open the interface, max out the temperature and turn it on. Depending on the amount of burn mix and its temperature you may need to wait a couple of seconds before it combusts into a beautiful plasma fire. Heaters(and freezers) will sometimes act strangely on horizontal and elbow pipes and not heat up the gas inside.. You may need to move it around until you find a place that works for you.
With the addition of holofans, it may be easier to use a holofan to hold back the gas and allow you entry to chuck a lit welder into the burn chamber.
Once your burn mix is lit you may notice it going out sporadically. This is because we still have the mix to waste pipes toggled off and the plasma fire is creating water vapor as a waste gas witch is taking up valuable space, displacing oxygen and plasma and snuffing out our fire. Simply open up your mix loop to waste and watch as the gas gets syphoned out through the loop back into the gas holding chambers. You may need to manually vent the mix chamber using the blast door toggle button to speed up the venting process. Once you have the mix loop connected to the waste loop, plasma and oxygen will continuously flow from the gas holding chambers into the mix chamber, combust into flame, and work its way out through the loop back into the holding chambers ready to start its journey once again.
Congratulations! you now have a fully self sufficient burn mix! The fire will continue to burn until you either run out of oxygen or plasma, or until the waste loop cant keep up with the pressure. Feel free to sit back and relax for a time while watching your burn mix combust into flame.
What now?
Now that we have a stable plasma fire, now what? Well, that's up for you to decide! Experiment with different plasma and oxygen ratios and see how it influences the temperature and pressure. Perhaps try to introduce a third gas into the chamber and see what happens. Extract your burning hot gas into a canister and drag it along behind you to show it off to the crew while grabbing a well deserved snack and drink at the bar. The possibilities are yours to decide! have fun and remember to enjoy the remainder of your shift aboard Space Station 14.

